Quick Start
This guide will show how to start chatting with your website visitors in three simple steps.
Login
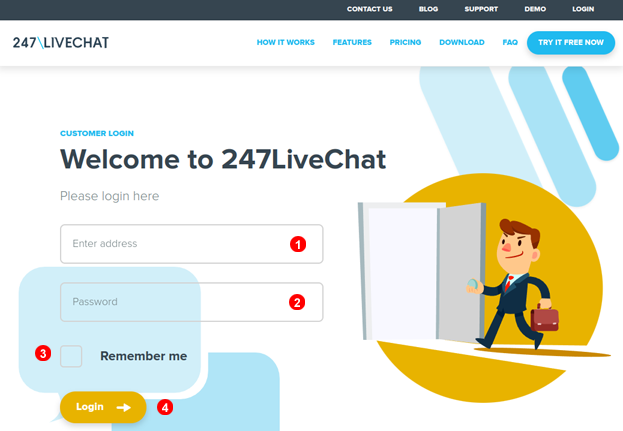
To login into the control panel navigate your web browser to login page and enter your email address into field (1) and password into filed (2). Optionally you can select "Remember me on this computer" checkbox (3) to have your email address saved. Finally click Login button (4).
User Interface overview
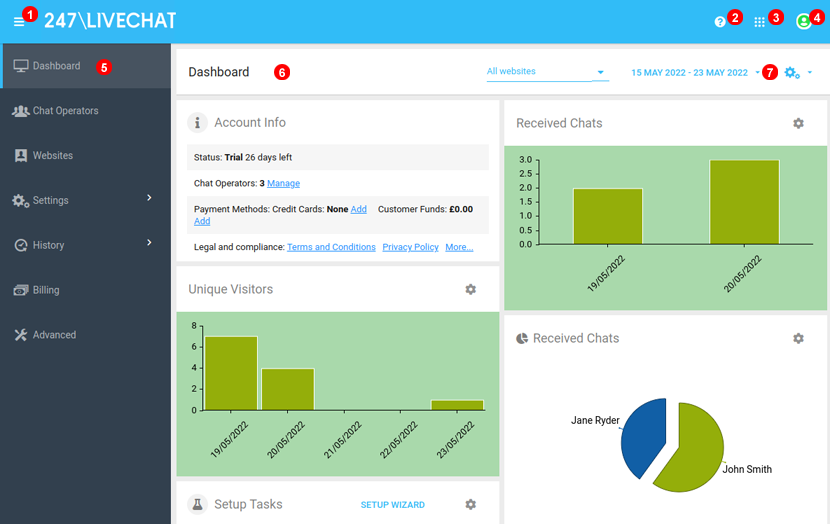
- Use this button to minimise or expand main navigation area.
- Click here to access Support.
- Here you can switch between
AdministrationandOperator Dashboardmode. - Click here to change your Profile settings or logout.
- Main navigation area.
- Contextual panel area. Here you can modify settings, create new operators or view chats history.
- In some panels top toolbar may have additional options such as filters or data export.
Get JavaScript tracking code
In order for Live Chat to show the icon and chat window for Visitors to connect with company Agents, it is necessary to add JavaScript tracking code to website HTML code.
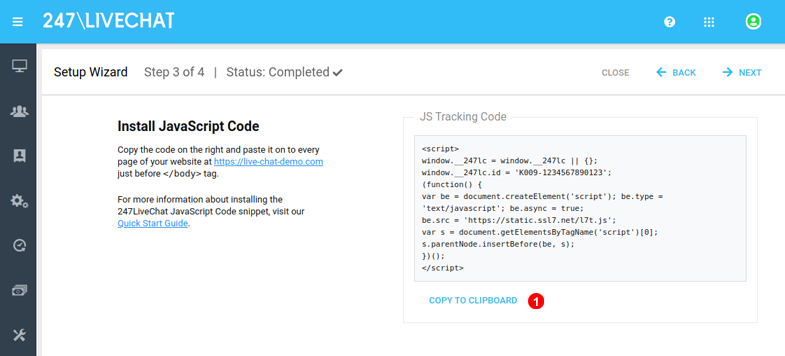
JavaScript tracking code can be found in Step 3 of Setup Wizard. Alternatively you can follow steps below:
![]()
- Click
Websiteslink in the main navigation. - Click link in
Namecolumn or if you don't have any websites added yet, clickADDbutton in to right cornter. - Click
COPY TO CLIPBOARDbutton.
Add JavaScript tacking code to your website
You'll need access to your web pages HTML. If you are using CMS (such as WordPress etc.) this can be achieved by creating a custom block. If you are unable to do this yourself, ask your web developer to perform these steps. Copy and paste your entire 247LiveChat JavaScript tracking code just before closing </body> tag on each page of your website.
Test Live Chats session
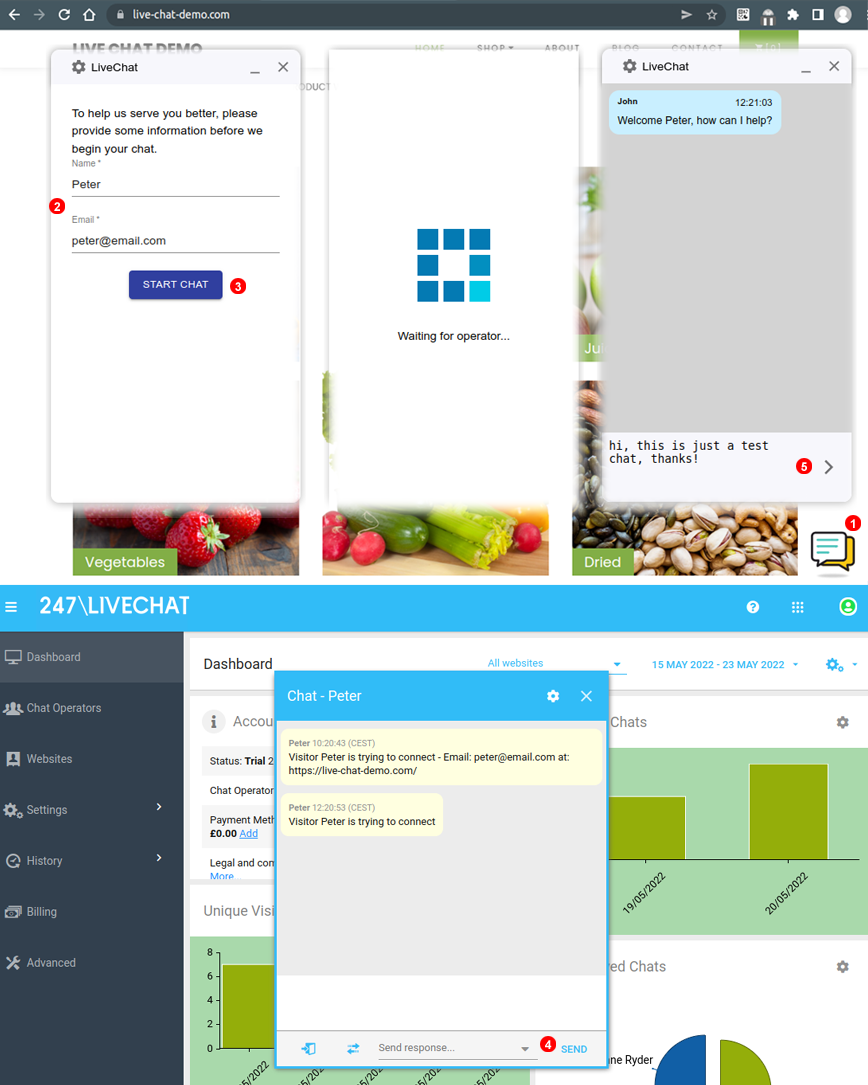
- Open your website and click Live Chat icon - be default located in bottom left corner.
- Enter "test visitor" name and email address.
- Click "START CHAT" button.
- In 247LiveChat Web Dashboard Live Chat window will popup. Type or select canned response and click "SEND".
- Congratulations, your first chat session has been just established.